2016年12月月 发布的文章

hadoop spark 大数据相关资源

小象《Hadoop 2.X大数据平台V3》
链接:http://pan.baidu.com/s/1nvS7GFJ 密码:tqng
《Spark 1.X 大数据平台V2》11月份班
链接:http://pan.baidu.com/s/1sl6KOGX 密码:qlea
深入浅出Hive企业级架构优化、Hive Sql优化、压缩和分布式缓存
链接:http://pan.baidu.com/s/1gfsmj3X 密码:50y2
资源整理中…….
欢迎大家补充!

CMU博士Tom Murphy的人工智能超级马里奥

跑了一下CMU博士Tom Murphy的人工智能程序来玩任天堂的超级马里奥,虽然是2013年就出来了,但是还是很激动呀。
这是他本人的博客:http://radar.spacebar.org/
资源都在这个网上有:http://www.cs.cmu.edu/~tom7/mario/
在文章的最下边是论文链接、源程序和编译好的可执行文件。
论文链接:http://www.cs.cmu.edu/~tom7/mario/mario.pdf
源程序:http://sourceforge.net/p/tom7misc/svn/HEAD/tree/trunk/tasbot/
可执行程序:http://www.cs.cmu.edu/~tom7/mario/playfun.7z
解压playfun.7z压缩包,会看到这些程序

playfun7z

playfun7z


打开readme文档,看作者的步骤提示:
1、运行平台是win7 64位系统
2、FCEUX是必须的,录制视频和回放人工智能玩的游戏都是靠这个来播放的。下载链接:http://www.fceux.com/web/download.html FCEUX 2.2.3 win32 Binary
下载超级马里奥的nes文件,用FCEUX完超级马里奥的游戏,并且录制视频
3、创建一个config.txt文件,文件内容包括下边三行文件:

game mario
movie me-playing-mario.fm2
moviename me-playing-mario.fm2

PS:readme文件是这么写的: Modify config.txt to contain e.g. 英文不好,理解为修改一个config.txt文件了,找了半天没找到,哎。其实是自己创建,后来在radar.spacebar.org/f/a/weblog/comment/1/1097 看到别人的评论里详细解释了这个步骤才得以解决。
4、记得在当前目录下有一个叫“mario.nes”的文件,还有录制好的视频命名为“me-playing-mario.fm2”,如下图:

nes

nes


5、点击ansicon.exe 在命令行里运行learnfun.exe 这个应该很快就运行完了
6.运行
playfun.exe –helper 8000
playfun.exe –helper 8001
….
playfun.exe –helper 8005
PS:根据机器配置选择合适的运行个数,否则机器会卡死。还有这个需要的时间特别长,据作者说几分钟的的视频需要运行好多天。我只启动了两个进程。
6、当所有的helper都输出ready,就可以跑主程序了 playfun.exe –master 8000 8001
7.最后会输出mario-playfun-backtrack-269-replacement.fm2文件,再用FCEUX就可以看到了。
mario

mario


这是用程序自己玩马里奥的视频,大概耗时24小时:

利用PostMan开发调试Restful API

利用PostMan开发调试Restful API
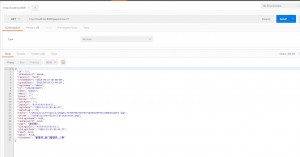
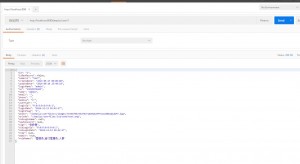
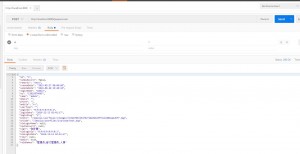
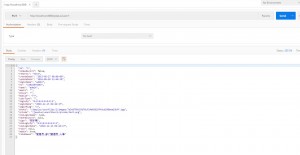
下边的图片是postman发送不同类型的请求,注意url和参数的变化:

get

get


delete

delete


post

post


put

put


利用spring mvc实现restful api ,需要修改的部分:

@RestController
还有就是要注意参数获取的方式,

参考后端代码:

/**
 * Copyright &copy; 2015-2020 <a href="http://www.jeeplus.org/">JeePlus</a> All rights reserved.
 */
package com.jeeplus.modules.sys.web;
import org.springframework.beans.factory.annotation.Autowired;
import org.springframework.web.bind.annotation.ModelAttribute;
import org.springframework.web.bind.annotation.PathVariable;
import org.springframework.web.bind.annotation.RequestMapping;
import org.springframework.web.bind.annotation.RequestMethod;
import org.springframework.web.bind.annotation.RestController;
import com.jeeplus.common.web.BaseController;
import com.jeeplus.modules.sys.entity.User;
import com.jeeplus.modules.sys.service.SystemService;
/**
 * 用户Controller
 * @author jeeplus
 * @version 2013-8-29
 */
@RestController
@RequestMapping(value = "/user")
public class UserController2 extends BaseController {
	@Autowired
	private SystemService systemService;
	@RequestMapping(value = "/{id}", method = RequestMethod.GET)
    public User viewGET(@PathVariable("id") String id) {
        User user = new User();
        user = systemService.getUser(id);
        System.out.println("get method");
        return user;
    }
	@RequestMapping(value = "/{id}", method = RequestMethod.DELETE)
    public User viewDELETE(@PathVariable("id") String id) {
        User user = new User();
        user = systemService.getUser(id);
        System.out.println("delete method");
        return user;
    }
	@RequestMapping(value = "", method = RequestMethod.POST)
    public User viewPOST(@ModelAttribute("user")User users) {
        User user = new User();
        user = systemService.getUser(users.getId());
        System.out.println("post method");
        return user;
    }
	@RequestMapping(value = "/{id}", method = RequestMethod.PUT)
    public User viewPUT(@ModelAttribute("user")User users) {
        User user = new User();
        user = systemService.getUser(users.getId());
        System.out.println("put method");
        return user;
    }
}

Eclipse修改SVN的地址

在Eclipse中选择Windows-> Show View->others  选中SVN资源库  然后选中原有的地址,选择“重新定位”,然后修改url即可